Jump to a section below:
-
Install OneDrive (optional)
- To install OneDrive, go to https://www.microsoft.com/en-us/microsoft-365/onedrive/download and click Download.
- Depending on your browser, select Run (in Edge or Internet Explorer), Setup (in Chrome), or OK (in Firefox).
If you see a prompt that says, Do you want to allow this app to make changes to your device? select Yes.
- Follow the on-screen prompts. If you are prompted to sign in, use your Microsoft (Office) 365 credentials, which are the same as your CIIS email credentials.
- Your installation is complete when you see You’re good to go! message. Select Close.
-
Upload
To upload to OneDrive on the web (onedrive.com)
- Go to onedrive.com and sign in using your Microsoft (Office) 365 credentials (same as your CIIS email credentials).
- Drag and drop the file from your computer onto the correct folder.
To upload using the installed OneDrive desktop client
- If you are working in a document and want to save it to OneDrive, go to File > Save a Copy > OneDrive – CIIS > navigate to a subfolder as needed > Save.
- To save a file or folder from your computer to OneDrive, drag the file or folder into OneDrive – CIIS in your File Explorer or Finder.
If you experience any issues with synching, visit the Microsoft support article or contact CIIS IT at support@uswired.com.
-
Share
- Select Share at the top right of your document.

- Select the location where you wish to upload your file.
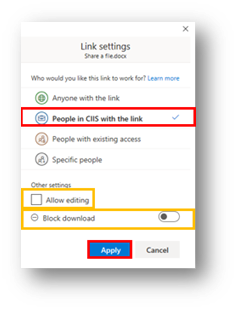
- Select the arrow to choose permissions for the link you will be sharing:

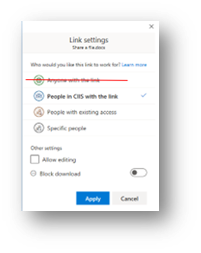
Options include:- Anyone with the link (this option is not secure)
- People in CIIS with the link
- People with existing access
- Specific people
- (Optional)
- Checkmark Allow editing to allow share recipients to change the document.
- Click Block download to prevent sharers from downloading it (for Word and Excel documents only).
- Set expiration and Set password (only available when choosing Anyone with the link).
- Select Apply to save the permissions.
- Copy the link or email it automatically.
- To copy a link, select Copy Link:
 Then paste the link where you wish (e.g. Canvas, an email message, etc.).
 - To have Microsoft email it, enter the name or CIIS email address of people you want to share with.
- Type a message.
- Select Send.
- Recipients will receive a notification to their CIIS email account. You will be notified when they have accessed the linked item.
- To copy a link, select Copy Link:
- When recipients click on the link, the document will open in a browser.
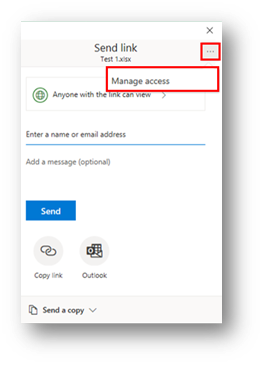
- To see who you shared the document with, click Share > 3 dots > Manage access

-
Common share options
-
-
People in CIIS with the link
-
This level of sharing is somewhat secure. It is generally fine for any documents that don’t contain student information, e.g. a lecture. Optionally, you can allow editing. Also, you can select Block download (for Word and Excel documents only).
-
-
Specific People

-
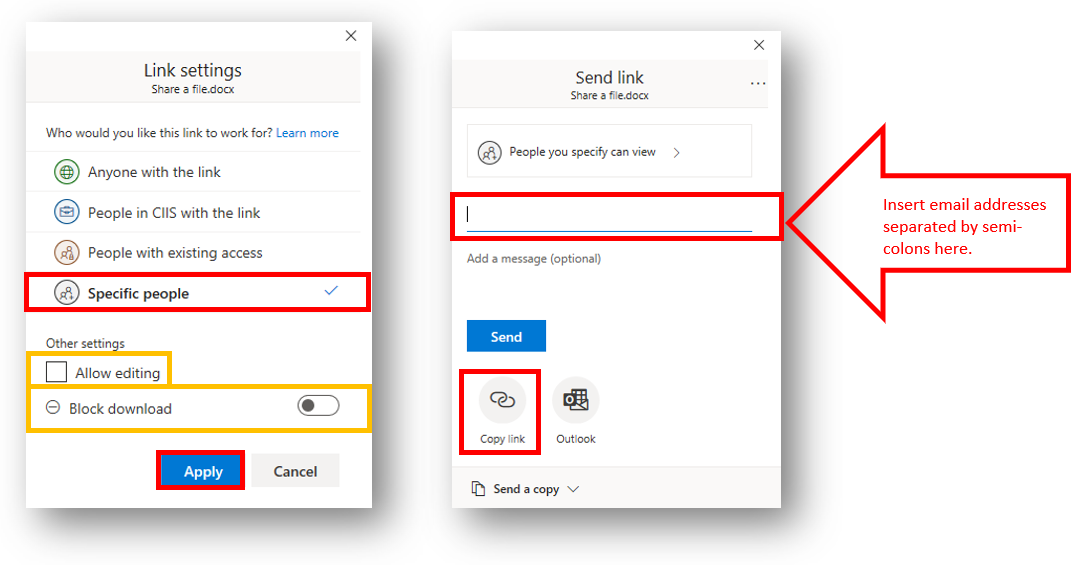
This level of sharing is more secure. It requires manually entering each share recipient’s email address.
-
-
- Select Specific people.
- (Optional) You can Allow editing.
- (Optional) You can select Block download (for Word and Excel documents only).
- Select Apply.
- A new window will open. Enter email addresses separated by semi-colons, or select the suggested names (make sure you’re selecting the correct email address if the recipient has both a Mymail and regular CIIS.edu account).
- To copy a link and paste it into an email message or elsewhere, select Copy link.
- Alternatively, select Send to have Microsoft send an email notification for you. This way you will be notified when they have accessed the linked item.
-

 • Somewhat secure: When choosing People in CIIS with the link, recipients must log in to Microsoft (Office) 365 (same credentials they use for email). Anyone in CIIS with the link will be able to access the document, whether they receive it directly from you or forwarded from someone else.