If you are on a Mac and have the Catalina OS or newer and will need to screenshare in Zoom or BigBlueButton, please follow the steps in this video to enable screensharing.
This article only applies to Zoom accounts that are managed by Online Learning.
If your class meets virtually—but your meeting links are not sent by VCL@ciis.edu—then the settings for your Zoom meetings may be different.
For questions about Zoom meetings that aren’t managed by Online Learning, please contact the Zoom account owner (possibly your program) or CIIS IT at support@uswired.com.
This guide describes using the Zoom desktop client on a computer (Macintosh or Windows).
For details about other devices, as well as the latest information, please see the Zoom Help Center.
What can I do in advance?
It is recommended to download and install Zoom on your device if you haven’t already. If using a web browser, please use Chrome only. Verify that your browser is up-to-date. For more information, see the Canvas Community article here.
Please check your Chrome settings to allow webcam and microphone access. Make sure that blindsidenetworks and Zoom don’t appear in the “Blocked” category for Mic. Do the same for Webcam.
Additionally, if you are on a Mac and have the Catalina OS or newer, please follow the steps in this video to enable screensharing.
If you encounter audio issues, check that Bluetooth headphones are not inadvertently connected (e.g. AirPods). For a demonstration of testing your audio, watch this Zoom support video (end at 1:09).
If you have a presentation file to share you may wish to save it as a PDF (File > Save as Adobe PDF in Windows or File > Save As > PDF > Save on Mac). Email it to the class in advance in case they need to open it on their end. (If you don’t have everyone’s email address handy, you can use the Canvas Inbox feature and attach it to a message to your entire class.) Presentations that are saved as a PDF won’t include dynamic transitions, video, etc (only text, hyperlinks, and static images such as photos).
If you will be showing a Youtube video, PDF, or other media, you can have it open and ready before you present.
Important note
Virtualized courses are not recorded based on university policy and federal (HHS HIPAA & FERPA) and state regulations. Virtualized courses are for synchronous (simultaneous) attendance only. Student attendance is required, and the university’s attendance policy applies.
For immediate assistance during a virtual course meeting, please visit www.vclhub.com.
- First, someone must be screensharing.
For security reasons, screenshare by participants (as opposed to the Host) must first be manually enabled.
To enable participant screenshare, the Host must first click the arrow next to Share Screen > click Advanced Sharing Options > click All Participants under “Who can share?” > close the window: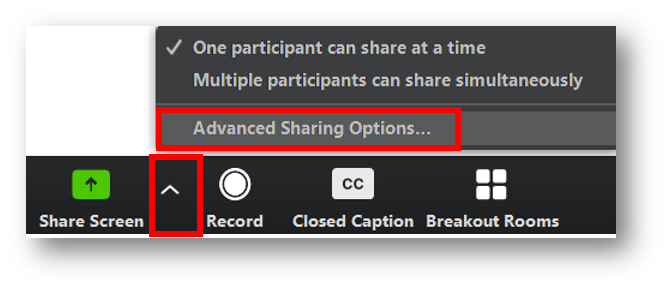

- To screenshare, the Participant/Host should click the green Share Screen button:

- Select an item to screenshare, then click Share.
(If you’d like to use a whiteboard, then select Whiteboard as below. However, please note that your annotations are not limited to whiteboards–you can annotate anything you screenshare, e.g. a website or PDF).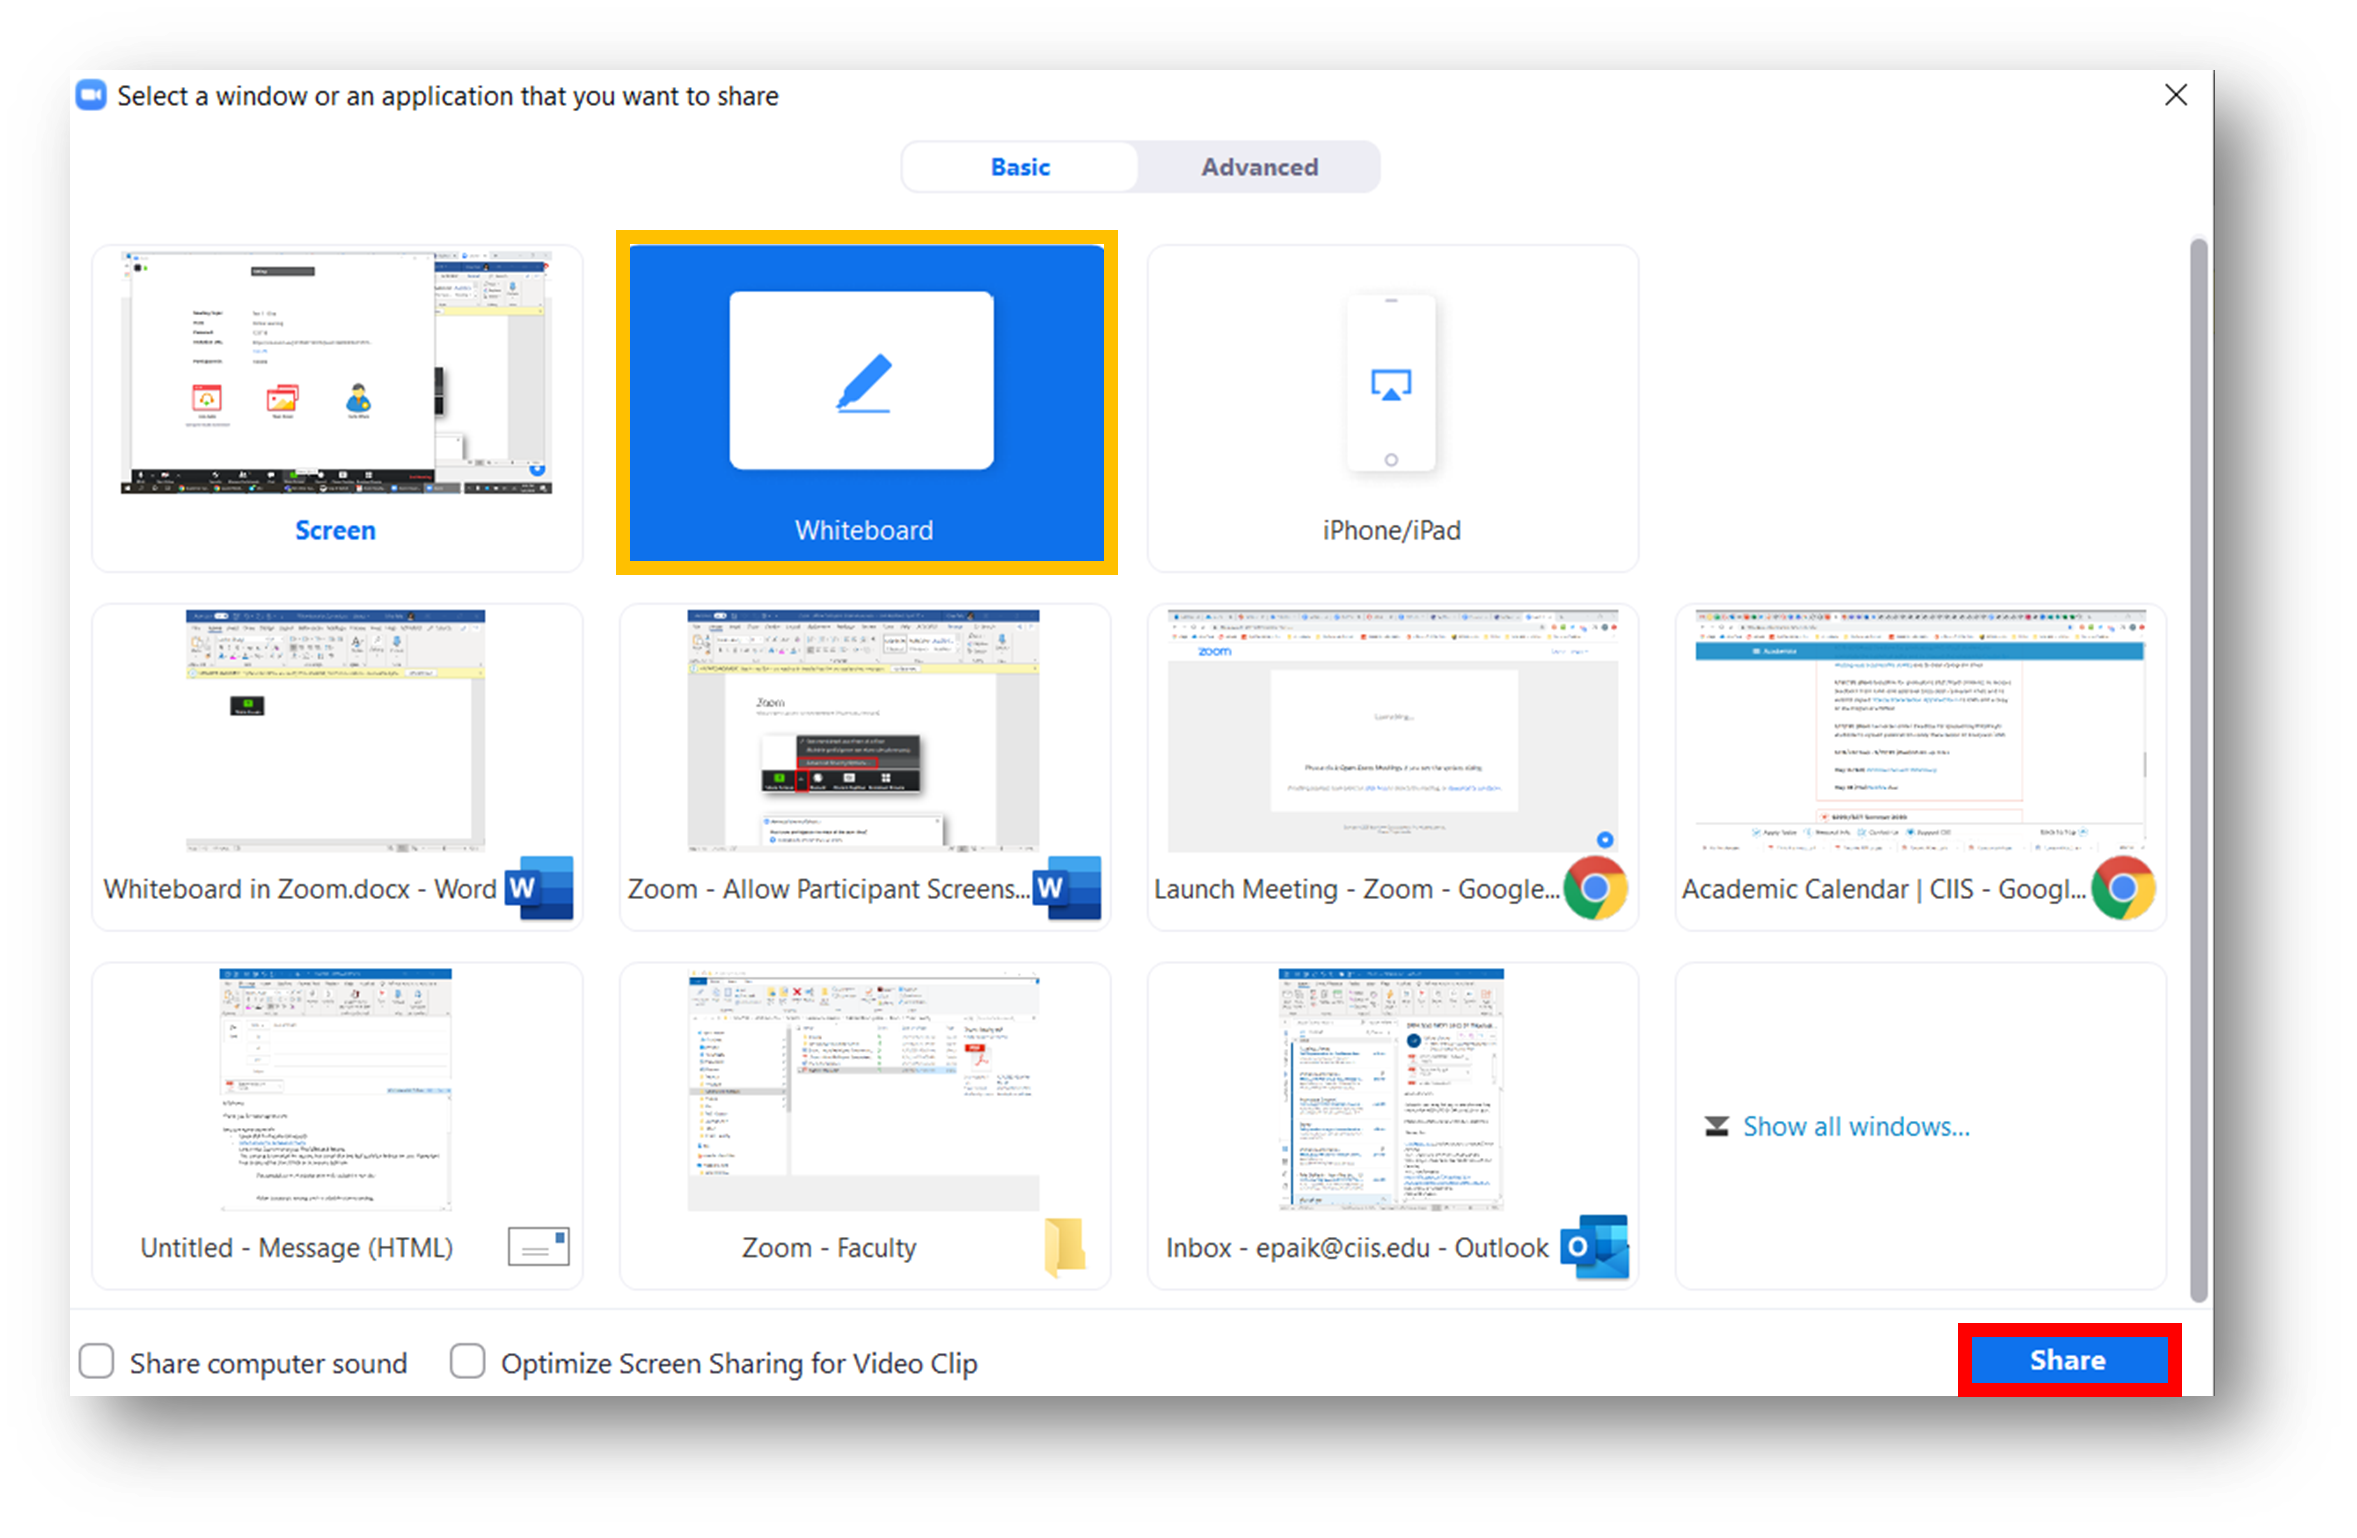
- To annotate, the Host can click Whiteboard in the black floating toolbar at the top of their screen:

Participants (non-hosts) would click Annotate.
- Click on an annotation tool from the toolbar: Text, Draw, Stamp, Spotlight, Eraser, Format (color, line width, and font).
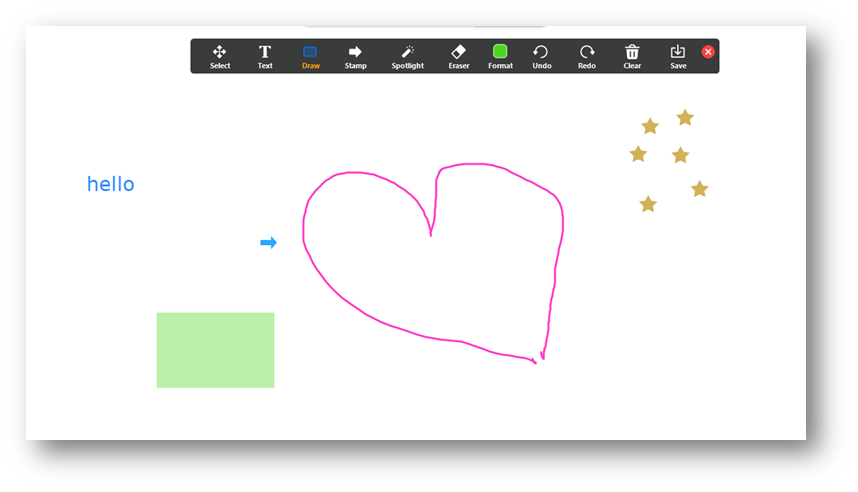
- You can undo/redo an annotation, or clear the entire annotation by clicking those respective buttons.
Also, you can save the annotation to your computer (click Save > show in folder to see where on your computer the file is being saved).
- When you are finished, click Stop Share.
