
To use the Roll Call Attendance tool
- Log in to ciis.instructure.com. Click on your course.
- If you don’t see your course:
- Click on Courses in the gray global navigation menu
- Click All Courses
- Click on your course
- If you don’t see your course:
- Click Attendance in the course navigation menu
- By default, Roll Call displays the List View tab [1], which shows all students in a list format. If you wish, you can view the class in the seating chart format by clicking the Class View tab [2]. Make sure your course is selected [3].
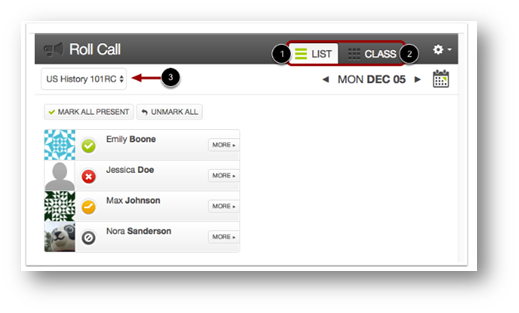
- View Attendance Dates.
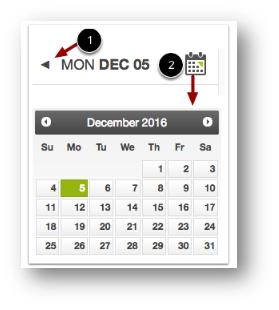
By default, Roll Call will display the current date.
You can edit attendance records for a different date by using the arrow icons next to the date [1] or by clicking the Calendar icon [2].
- Take Attendance in List View:
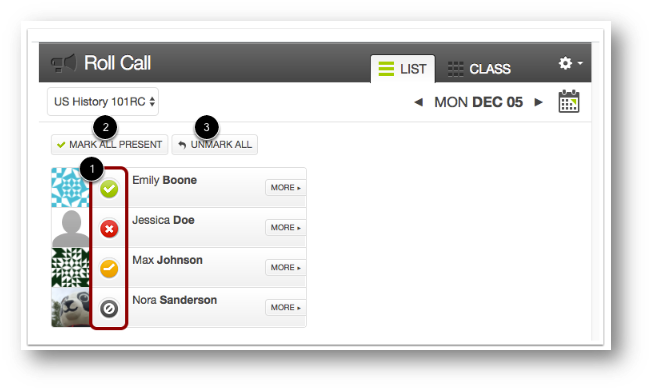 In the List View, you can take attendance by toggling the correct mark next to each student’s name [1]. Click the attendance mark until you arrive at the desired mark:
- To mark the student as present and on time, click one time (green check mark icon).
- To mark the student as not present, click two times (red X icon).
- To mark the student as late, click three times (orange clock icon).
- To unmark the attendance status, leave the button as the default (gray null icon). Points will be neither awarded nor deducted for attendance for this day.
You can also take attendance by clicking the Mark All Present button [2].
If you need to start over or clear all attendance entries, click the Unmark All button [3]. - Take attendance for each class meeting. Select the date by using either the calendar icon near the top right or the arrows to scroll to the correct date.
- After you’ve taken attendance once, you can edit settings such as point values or weighted percentages. Please make sure to make any edits as soon as possible after the first time you’ve taken attendance, since certain edits cannot be made once the tool has been in regular use. Once you’ve made edits, do not make changes again. Please contact onlinelearningsupport@ciis.edu after the first time you’ve taken attendance if you’d like help making edits.
- If your course uses weighted grades, go to the Assignments tab. Confirm that the Rollcall Attendance tool appears in the correct group (e.g. Attendance) so that it will be weighted using the correct percentage.
If Rollcall Attendance appears in a different group, drag and drop it using the 8 dots into the correct group.
How do I handle an excused absence?
Although Roll Call doesn’t have an “excused” category, here are two ways you can manage this.
Method #1: Mark them as either Absent or Present
You can always retroactively mark a student as present or absent for a day that has passed. Click the calendar to go back to a past date and change the student’s attendance.
- Marking them Present will give them points for attendance that day.
- Marking them Absent will deduct attendance points for that day.
Method #2: Just Ignore It
If a student is absent one day, and you allow two unexcused absences (for example), just don’t take attendance for that student that day.
- An unmarked status will count neither for nor against the final score. You can leave their status on the default “unmarked” category.
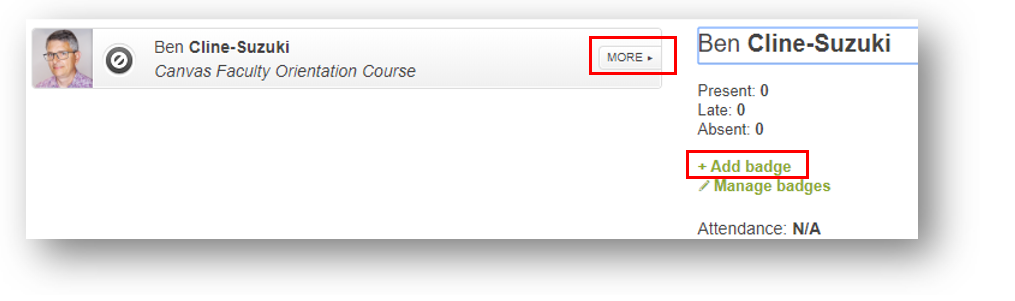
- If you wish to keep track of how many times a student had an excused absence, use a badge.
Roll Call allows you to create “badges” within its attendance tool. These badges are like a private “tag” that only you can see.
-
- This will help you keep track, but when used alone has no effect on the Attendance score.
- You can create a badge called “Excused.” Then, apply it to students who have used up one of their excused absences.
- To create a badge:
-
-
- In the Attendance tab, go to the date you wish to mark.
- Click on More next to any students’ name
- Click Add badge
-
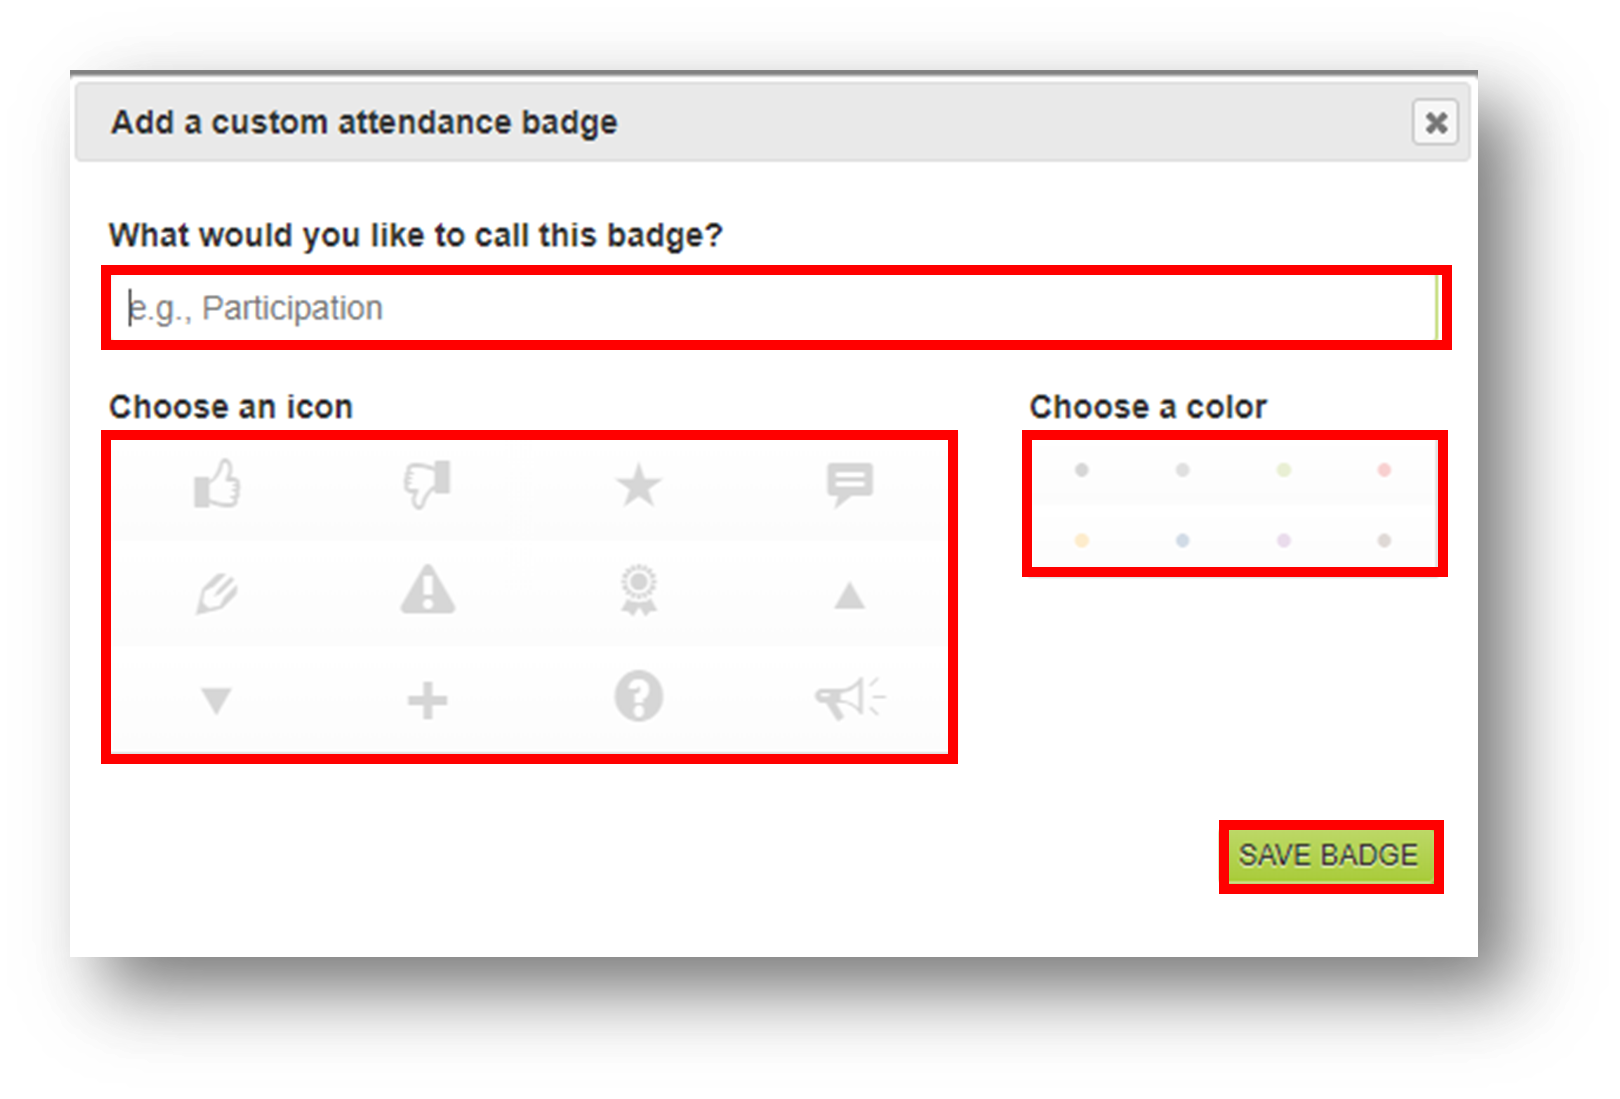
In the dialog box that appears, fill in each field:
- Title, e.g., “Excused”
- Choose an icon
- Choose a color
- Then click Save Badge
You’ll see the badge appear.
To select the badge for that student, click it until it turns the color you’d chosen. You can unclick it at any time.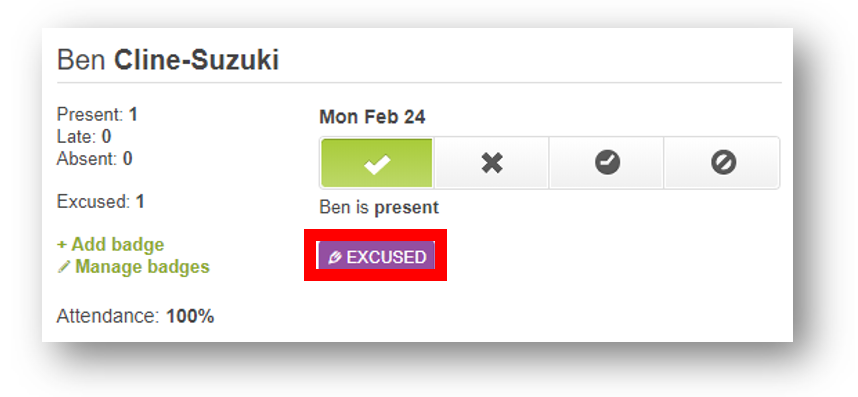
Later on you can see how many excused absence they’ve accumulated by either:
- Going to every course meeting using the calendar and checking for that student’s badge, OR
- Generating a report. To generate a report:
- Go to the gear icon > Attendance Report.
- A spreadsheet CSV file will be emailed to you instantly.
- Use it to see when a student was Unmarked, then refer to the Rollcall Attendance tab to see if you’d entered a badge for that date. (The report doesn’t contain badge information).