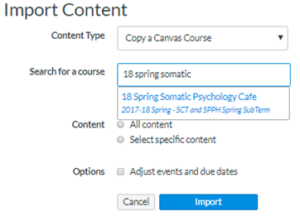
This can be faster than editing Assignments individually. Seeing all Assignments on a single calendar can be helpful for context and planning.
- Click on the Calendar button in the Canvas gray global navigation menu
- Click your course at the far right
- You can change an Assignment’s due date by dragging & dropping it, or enter a date manually.
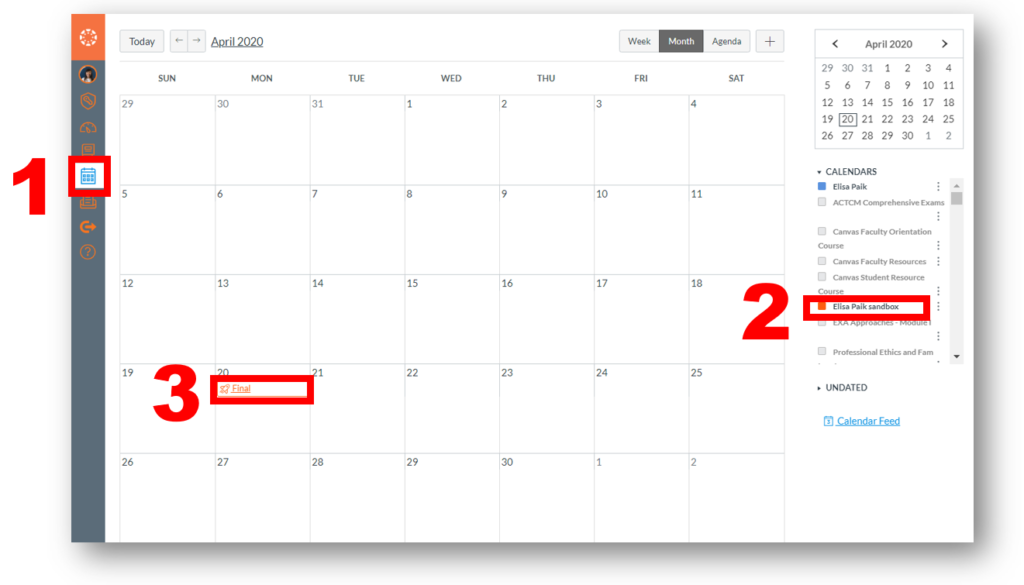
- To drag & drop: Select the Assignment title on the calendar. Drag and drop it to the calendar square that indicates the desired due date.
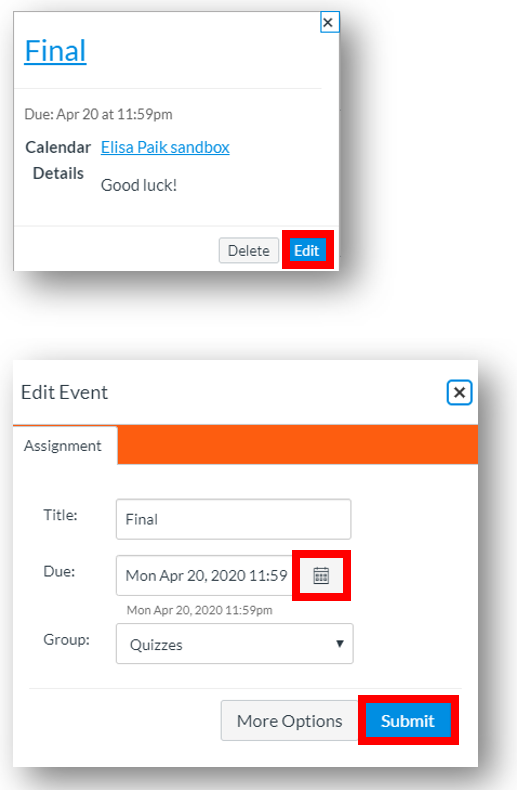
- To manually enter a date: Click the Assignment on the calendar. In the window that opens, click Edit. In the next window, choose a new date and click Submit.
- You have now changed the due date for this Assignment—not just on your calendar, but for the actual Assignment. You can check it by going to the Assignments tab and confirming that the due date has changed. Continue doing this with each Assignment that needs updating.
Undated Assignments
If you have any Undated assignments (Assignments Discussions, or Quizzes with no due dates established) you can quickly add dates by dragging and dropping them onto the calendar.
- Click on the Calendar button in the Canvas gray global navigation menu
- Click your course at the far right
- Unfurl the arrow next to Undated
- In the list that appears, drag any Assignment onto the calendar to the due date you wish to establish.
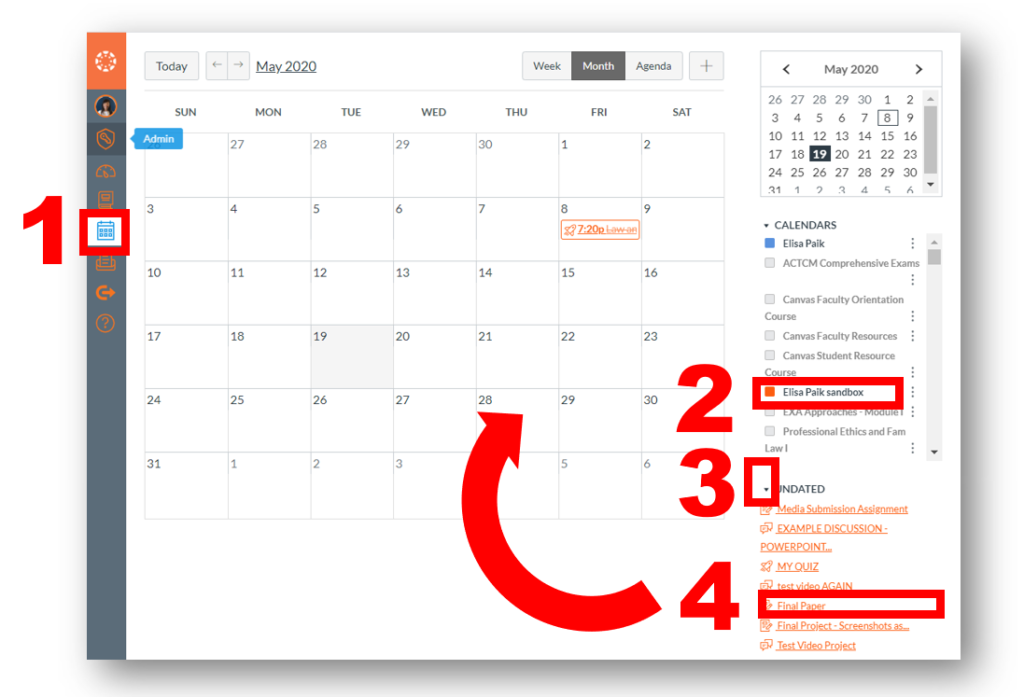
- You have now changed the due date for this Assignment—not just on your calendar, but for the actual Assignment. You can check it by going to the Assignments tab and confirming that the due date has changed. Continue doing this with each Assignment that needs a due date.
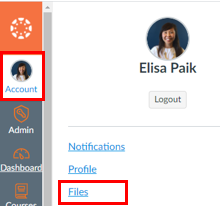
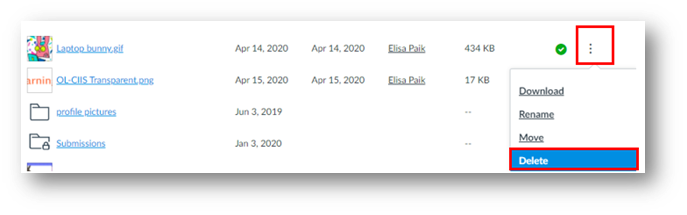
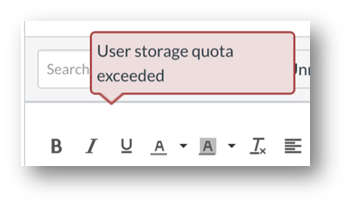 Exceeding your storage limit can prevent you from uploading files to Discussions, Conversation messages, My Files, and other items.